I’ve been an avid DD-WRT user for about two years now, and I’ve decided to compile a list of the top 10 reasons for me to love it. If you want to get started on DD-WRT, you will need a compatible router and then you will need to flash it with DD-WRT.
1 – VPN Client to encrypt all traffic leaving your home
Arguably the reason why I got started with DD-WRT. We live in a world where individuals, companies, and governments, can and do peek at your internet traffic and hold you accountable for anything that could be used against you. Examples of this are the famous love letters that Comcast sends their clients that are downloading movies, or the Chinese dissidents that are put in prison for complaining about the government.
Running a VPN client on DD-WRT couldn’t be easier. Most VPN providers give instructions on how to set it up. Running a VPN on your router is preferable to running it on individual devices, first, you have to only set up one device, not many. Secondly, it’s more secure, since it will protect us against IP leakage.
2 – Access your local devices by URL
Conveniently you can assign names to devices at home. E.g my router is no longer 192.168.1.1, instead, I access router.hom.e, similarly my raspberry pi is rpi.hom.e. Before I would try to assign static IPs, and I will try to remember those.
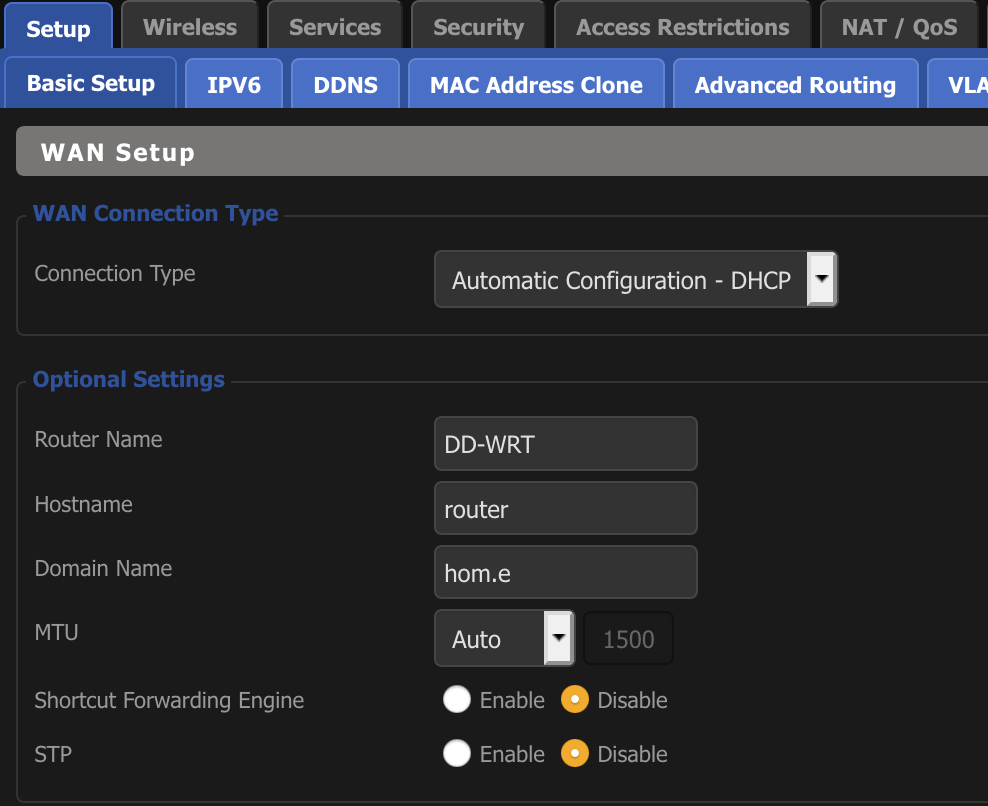
Setting this up is straightforward. First, create a domain name, I choose hom.e.
Then, find out the MAC address of each of your devices, and put that information into DD-WRT, as with this table.
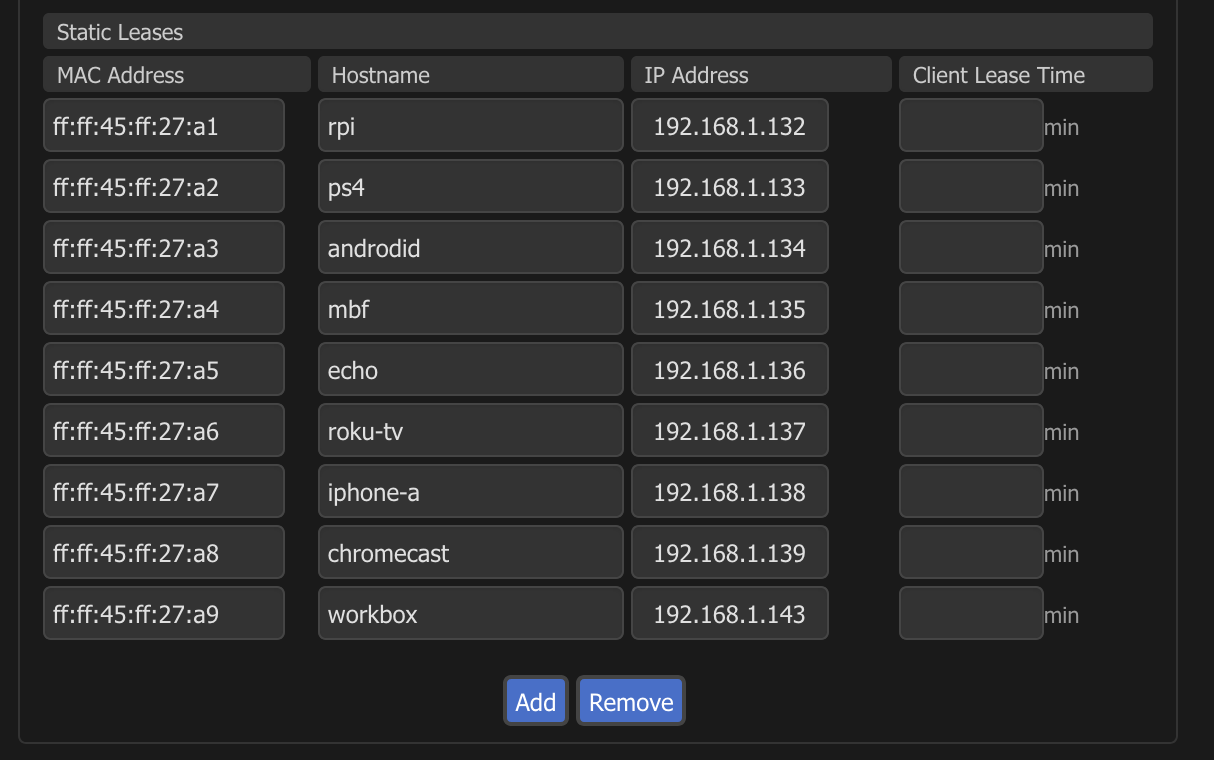
From now on, you will be able to access your devices by name.
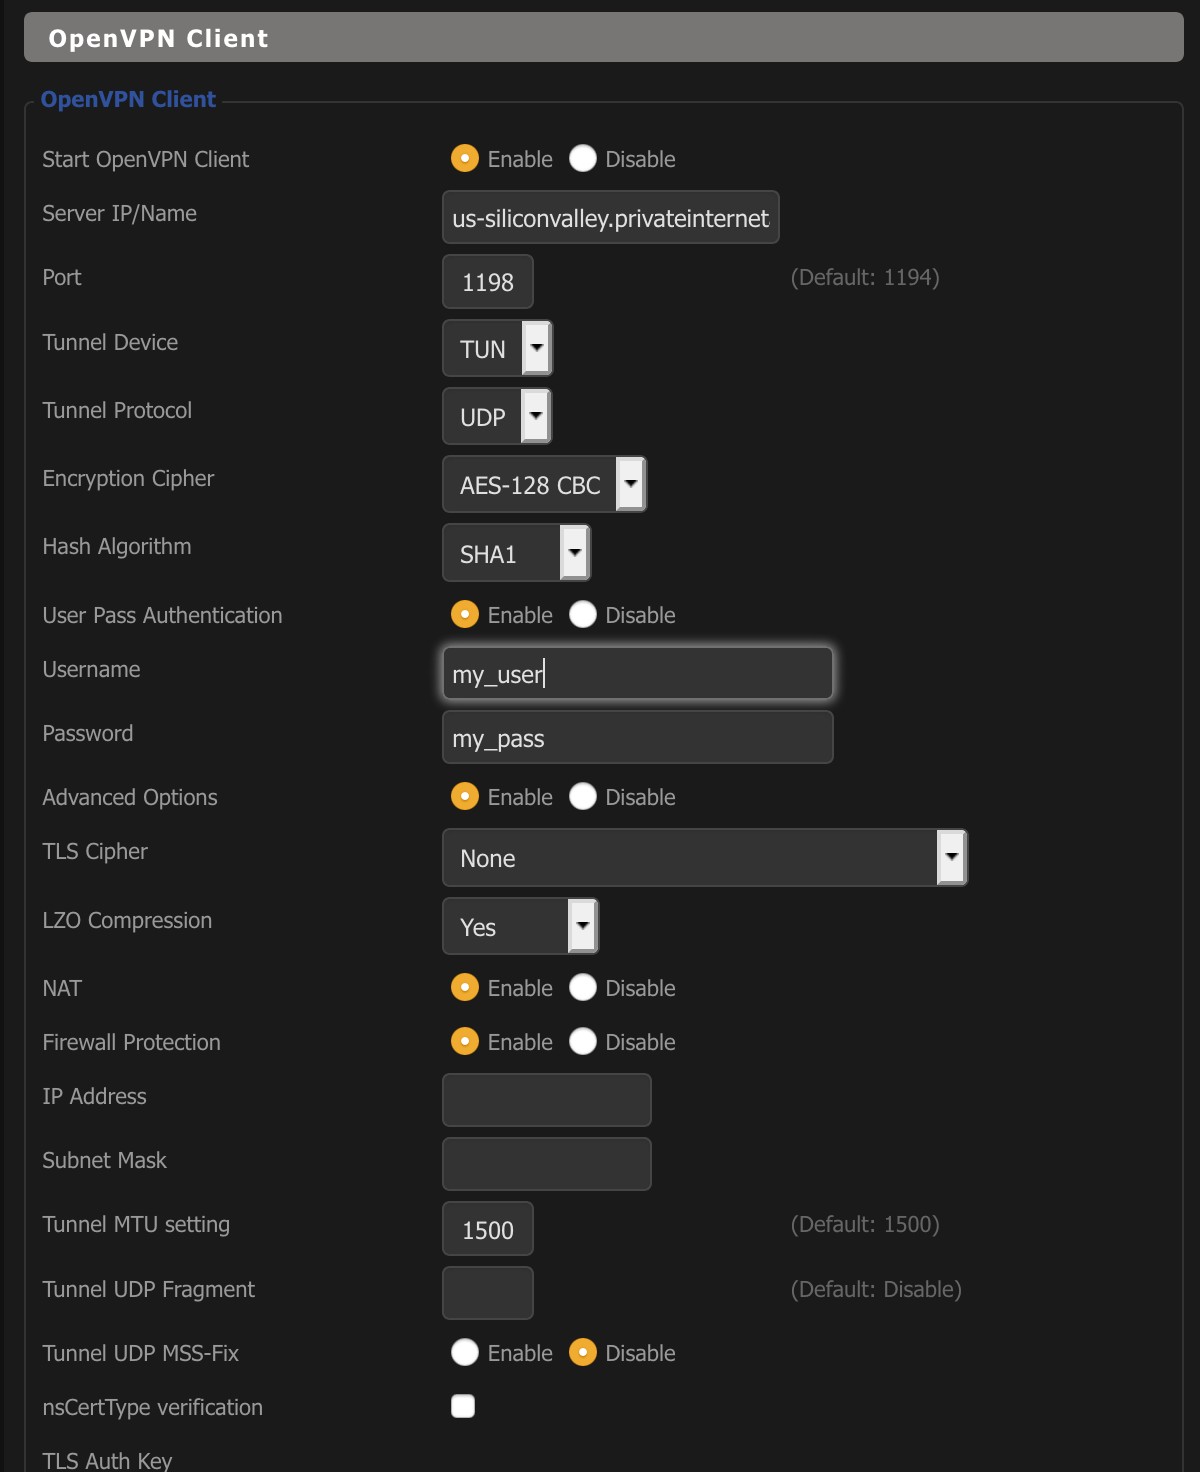
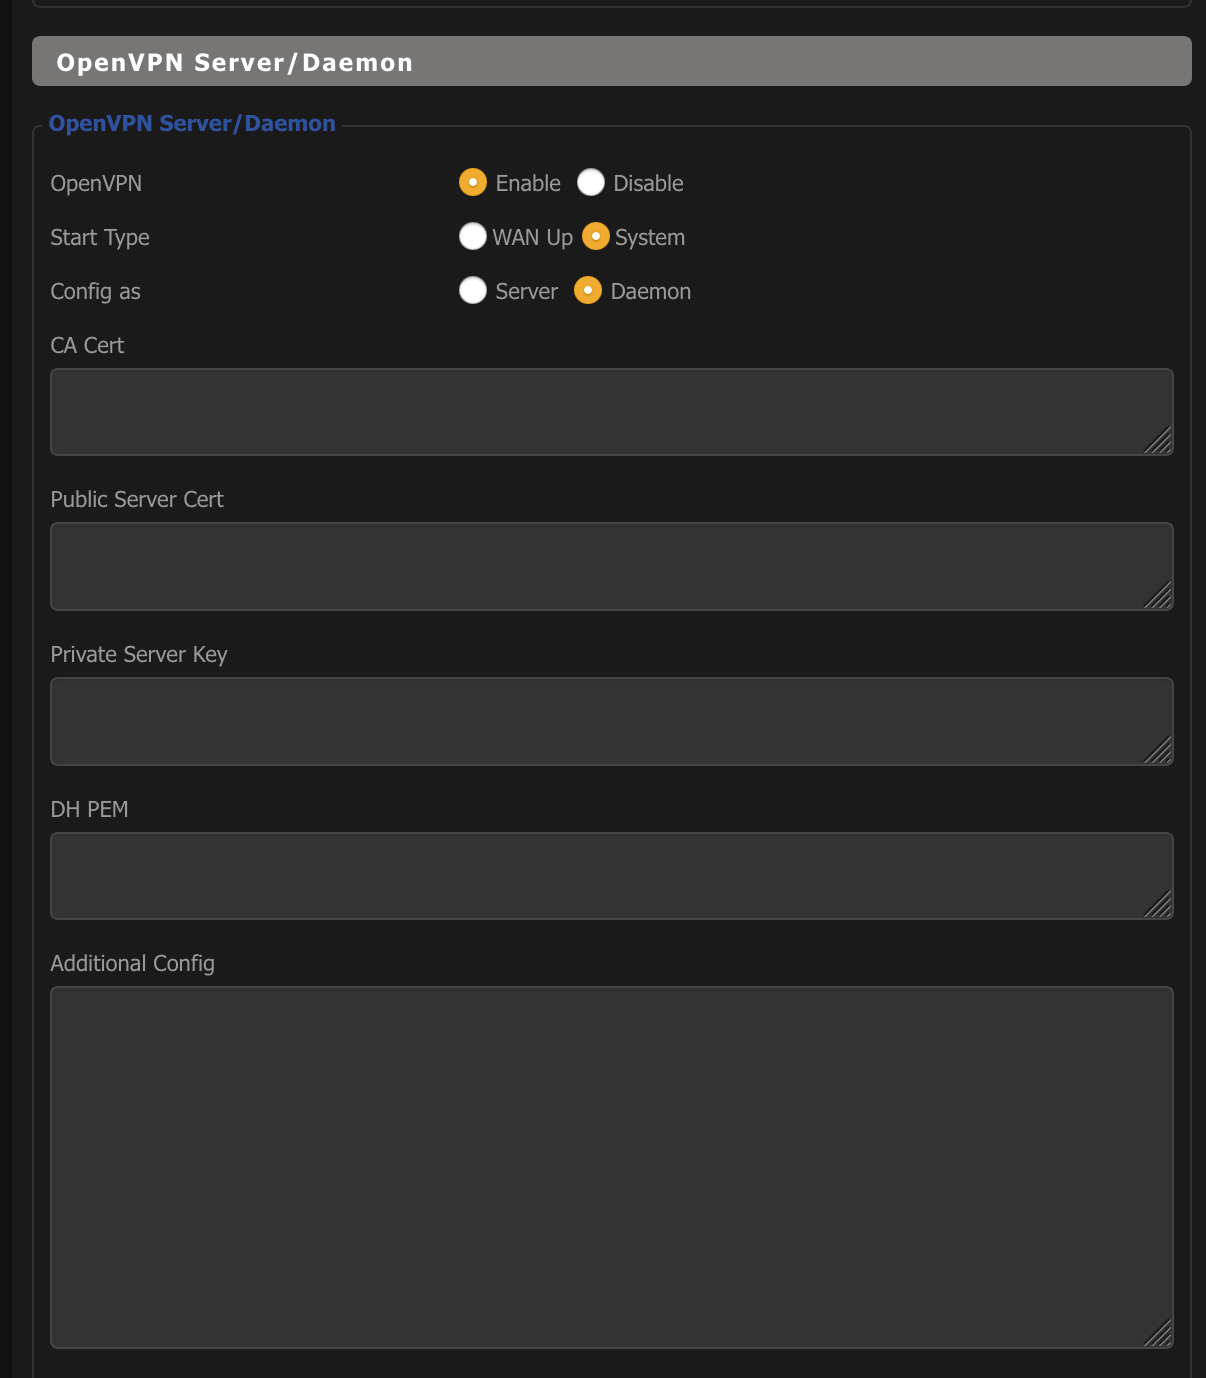
3 – Run a VPN server to connect remotely
As the name indicates, running a VPN server on your router will allow you to connect to your home network when you are remote. This brings three main benefits: first, when using public networks your traffic is encrypted, secondly, if you are running advertising blocking on your router, you will also enjoy this feature, even when being remote. Finally, when paired with reason 7, your NAS will be available no matter where will you go. In other words, you could have a fully private 2TB “Dropbox on the cheap” no matter where you are.
I personally run my VPN server on my raspberry pi. PiVPN makes it very easy to run a VPN server on your RPI, it will generate the DH, private and public keys, and it will also let you manage your user credentials. So if you have an RPI, I highly recommend going down this route.
Shall you choose to run your OpenVPN on your DD-WRT, you will need to generate the DH keys and the certificates yourself in another machine, and then input them in the UI.
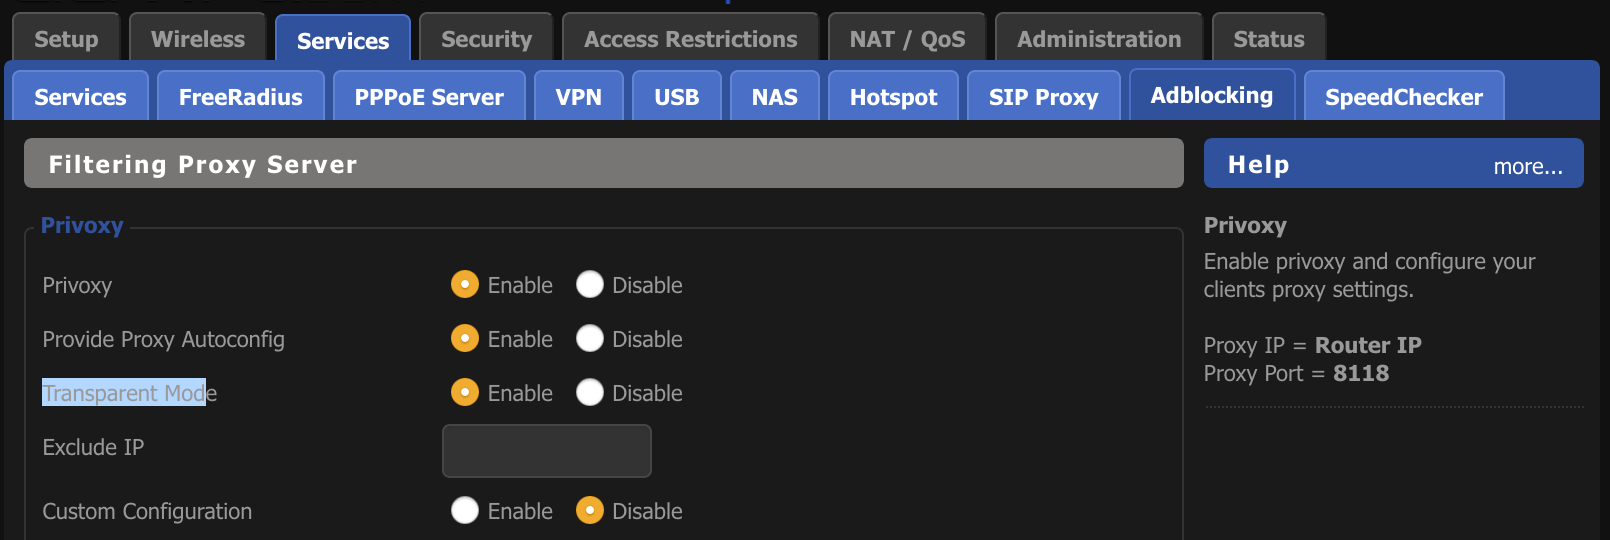
4 – Block advertising
Using privoxy we can filter advertising on all devices on our network. As with the VPN client, this is much more effective when done at the router level versus at the device level. DD-WRT comes with Privoxy, a fantastic project, and although the setup can get quite complicated, in it’s most basic form, it will filter a decent amount of junk and can run transparently.
To enable privoxy, head to Services -> Privoxy, and enable it there. This is how mine is looking:
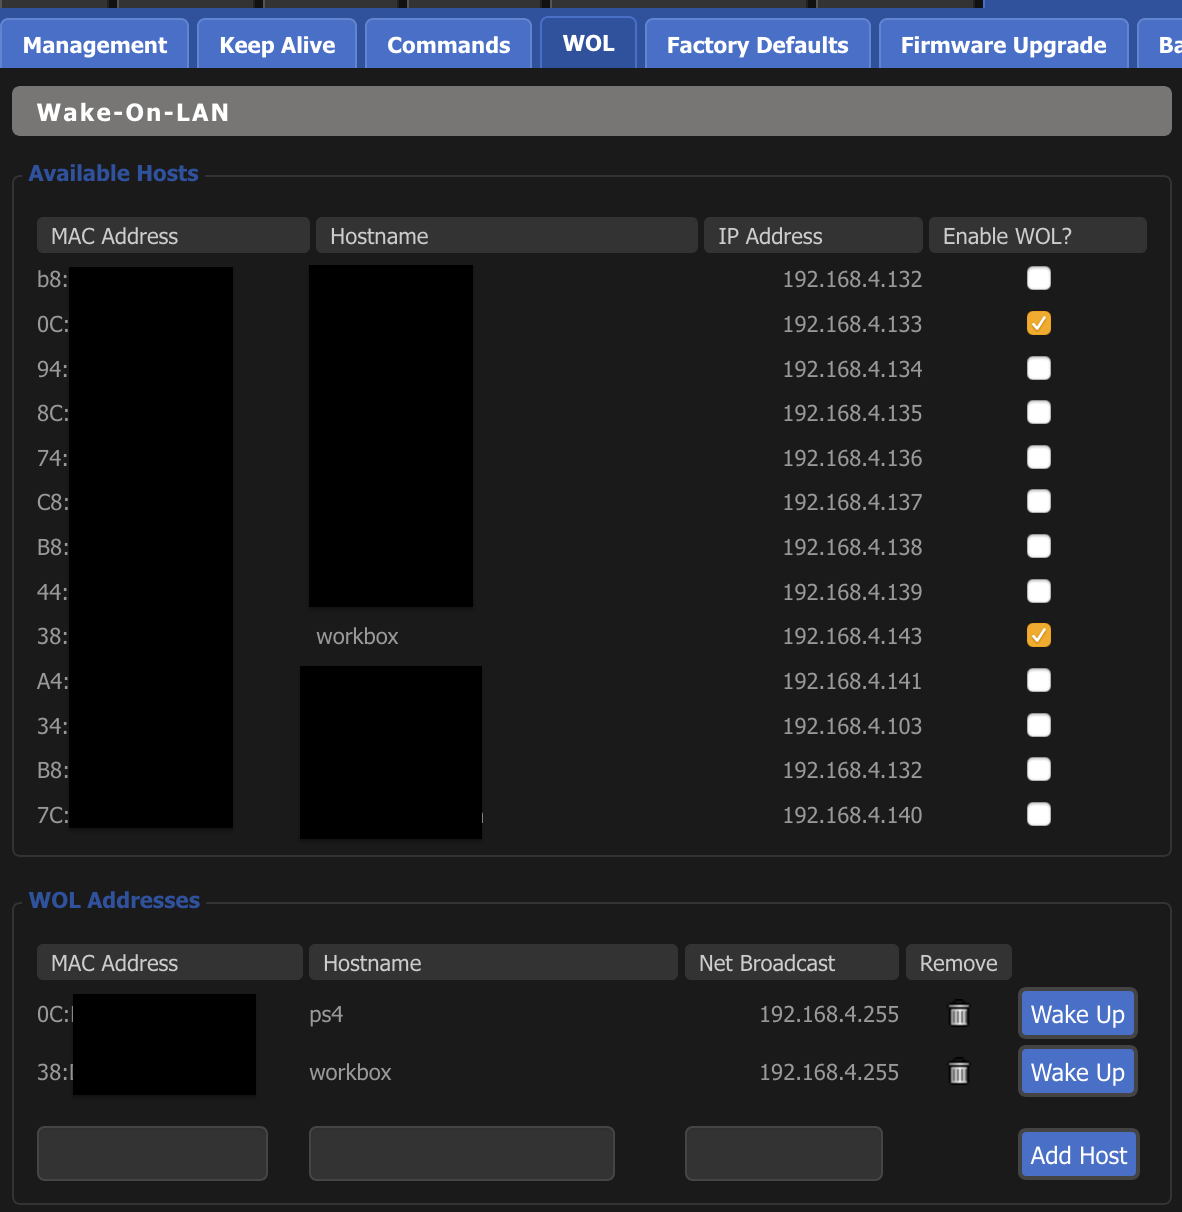
5 – Wake On LAN (WON)
Wake On LAN means that you can wake up a sleeping device from the DD-WRT web panel. I have a desktop computer at home that’s sleeping most of the time and that I access via Remote Desktop. This feature allows me to keep the computer sleeping with minimal power consumption, and to start it whenever I want from the DD-WRT dashboard.
To enable this feature, you need to set the operating system of the machine to go to sleep after say 2 hours of inactivity. You also need to tell the OS that the Ethernet card can wake up the computer. These settings vary across OSes, but I can point to this article if you are interested in enabling it.
Once enabled on the OS, in DD-WRT, you can enable WOL under Administration -> WOL. You’ll need the MAC address of the device you plan to wake with this feature. Something that you can find on the target machine, or on DD-WRT itself if said machine is already connected to it.
6 – OpenDNS or Level3 for DNS
This can easily be done with most other router’s software. Most people out there are using Google’s DNS, the infamous 8.8.8.8. Great performance, but, be aware that Google then knows which websites you are accessing. My suggestion is to use an alternative, and there are plenty: OpenDNS, the legendary Level3 or, Adguard.
I run the latter and couldn’t be happier. Their focus is on privacy, and as a bonus, they also block advertising by URL name. Setting up a DNS server is a matter of finding their IP, and putting them in the corresponding form.
In my case, I am using AdGuard and Level3 as a fallback. This is how my setup looks like.
7- NAS
Again an extremely convenient feature. NAS stands for Network Attached Storage. Modern routers come with USB ports, some of them, even USB 3. This allows us to connect a USB drive to our router, and to then access it from any device in the local network. I use this all the time with videos, photos, and other documents.
To enable this feature, you first must enable USB support for DD-WRT. Head to Services -> USB, and there enable USB Core support.
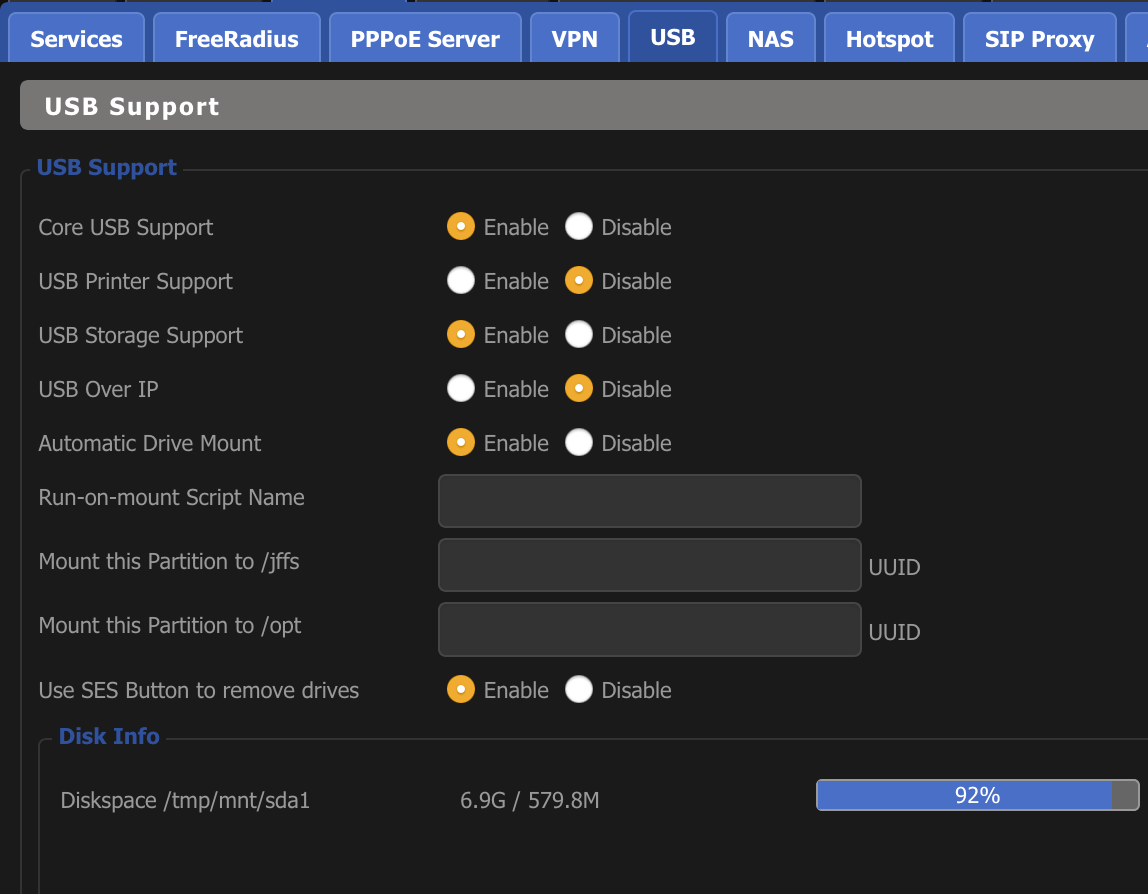
At this point, you can connect your USB drive to your router, and if it’s formatted in a compatible filesystem (I recommend ext4), it will be mounted automatically.
Then head over to Service -> NAS, and enable Samba. Last part before we are done is to create a username and password, and you do that under the File Sharing tab. Make sure you enable the ‘samba’ check.
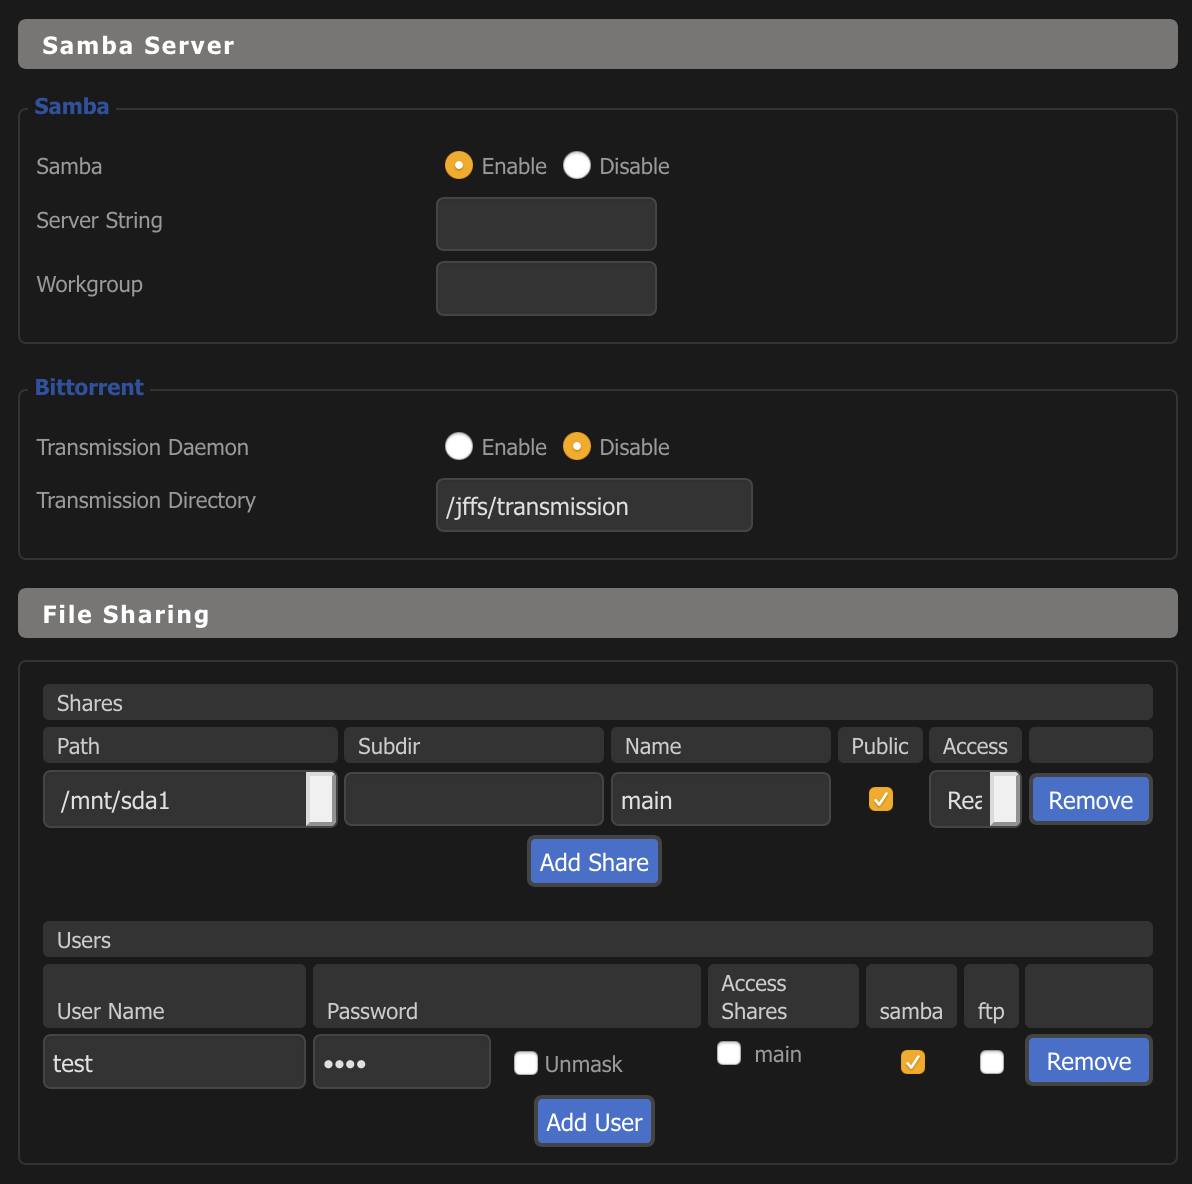
Now you can access your files from any device in your local network.
8 – tcpdump
tcpdump is a very useful UNIX command that can monitor TCP and UDP packages that a device is receiving and sending. This can be used for debugging purposes on your local computer.
The great part of running tcpdump in your router is that you can see all traffic from any device in your network since all devices are connected to the router. To run tcpdump in your router you will need to first SSH into it. To enable SSH in your router, go to Services -> Services, and there you will see an SSH section, like this one.
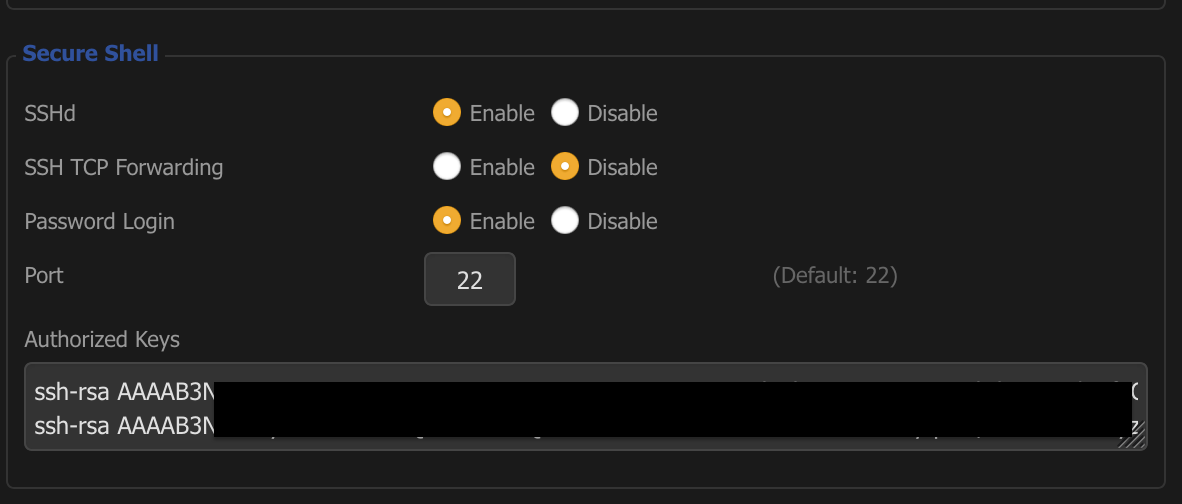
In the Authorized Keys section, add the public SSH keys of the device(s) you will use to access the router. Then, you should be able to run something like ssh root@router.hom.e
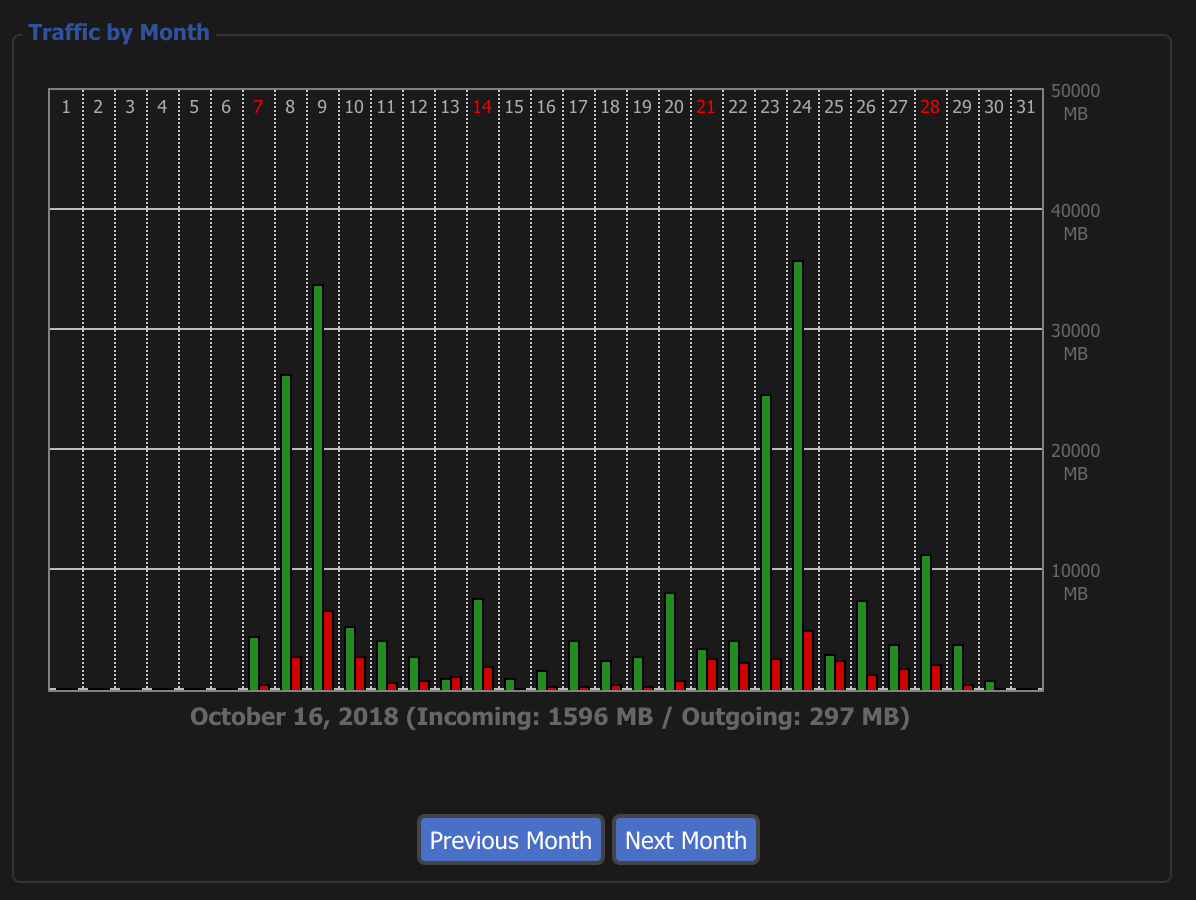
9 – Bandwidth monitoring
Since some companies (cough.. Comcast.. cough) are now measuring the GBytes you download and charging you for it if you go above. It is important to keep an eye on usage, especially for download heavy users. DD-WRT automatically aggregates this kind of data for you, and it’s available under Status -> WAN.
This is how my usage looks over the last month.
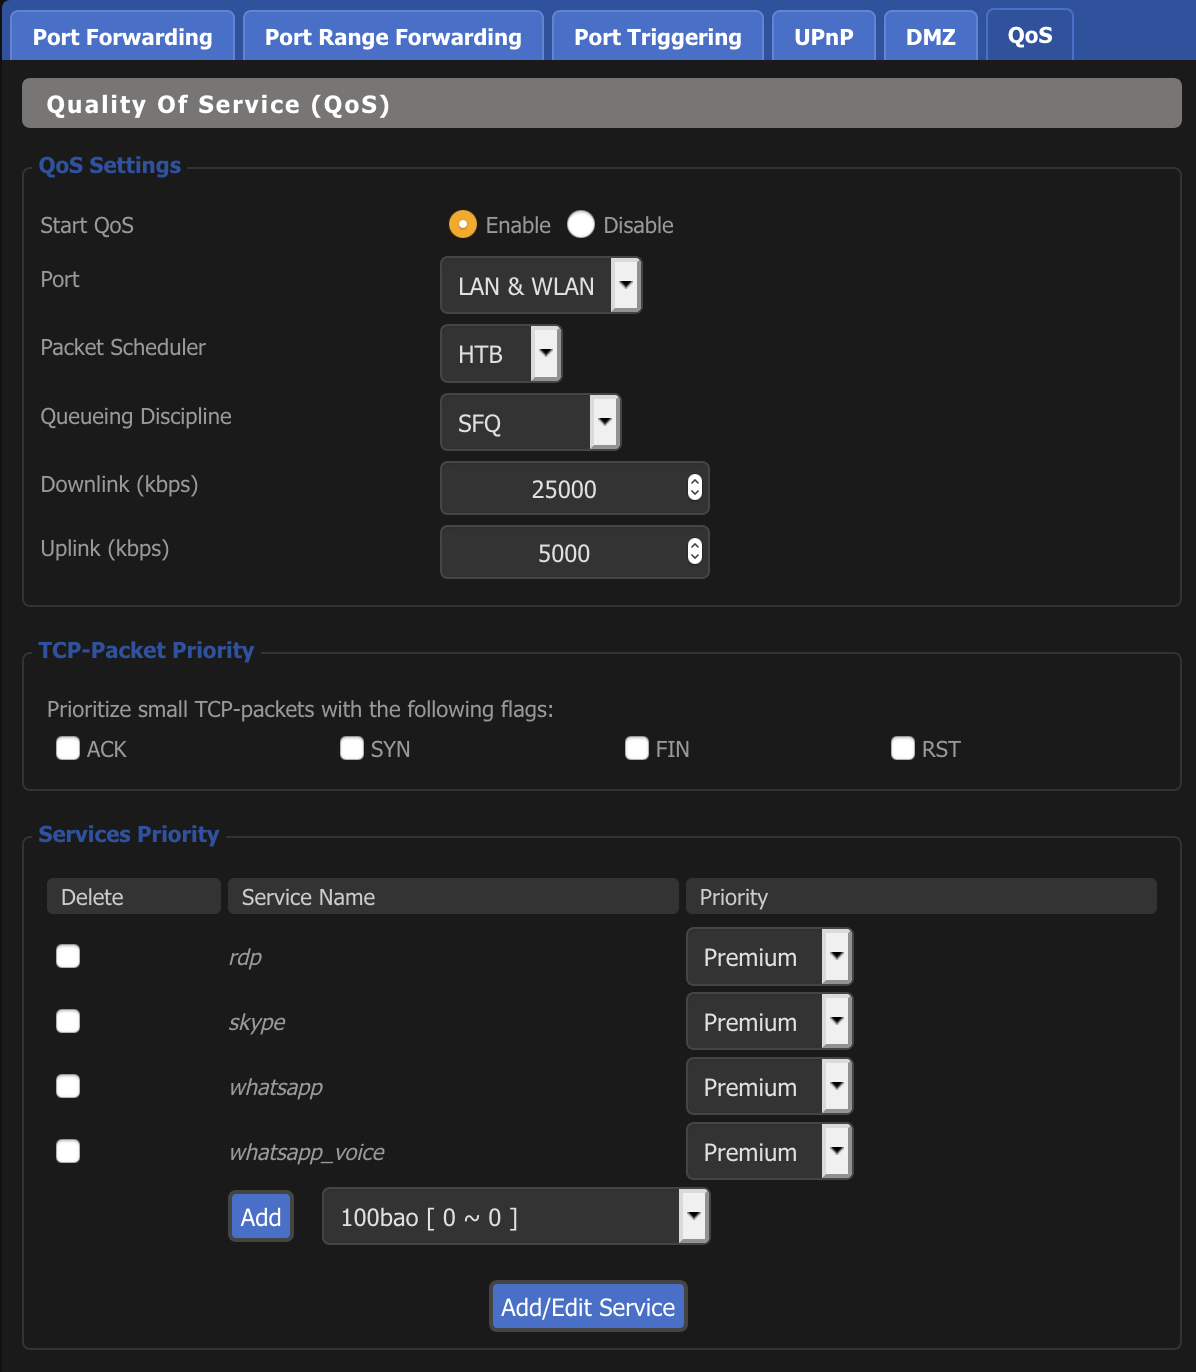
10 – QoS
My last reason for choosing DD-WRT is QoS (Quality of Service). This feature tells the router to prioritize certain types of traffic over the rest. In a typical home, we have dozens of devices connected, and it’s not uncommon for someone to be streaming YouTube, while another person is trying to call a friend over Skype. Under this scenario, it makes more sense to prioritize Skype over YouTube, since YouTube can buffer and Skype cannot.
To set up QoS, go to NAT/QoS -> QoS. There is a checkbox for enabling QoS, and also a form to select the services you want to prioritize. In my case, I use Skype, WhatsApp and Remote Desktop (RDP) quite often, and these applications would benefit from improved latency.
This is how my QoS settings look like: